Introduction to ArangoDb, open source, NoSQL, multi-model database
BigData seems to be getting stronger every day and more and more NoSQL databases are coming out to the market, all trying to position themselves in the lead to be the reference. This week I tried ArangoDB! Another NoSQL database? Today I'm going to tell you what I thought of ArangoDB.
ArangoDB is an open source, NoSQL, multi-model database developed by triAGENS GmbH. It is a multi-purpose database with a flexible data model for documents, graphs, and key-values. It provides all the database features that are needed for a modern web application.
When working with documents, MongoDB, CouchBase or Cassandra seem to be at the forefront, there are other NoSQL database oriented to networks such as Neo4j or Horton. Maybe ArangoDB may not be as popular as these, but that doesn't mean it's worse. One thing that has caught my attention about this NoSQL database engine is that it combines the key values and graphs.
ArangoDB provides user-friendly, easy-to-use, graphical user interface and a CLI for system administration and system monitoring.
In this tutorial we will learn how to install and configure ArangoDB on Ubuntu 16.04.
Requirements
- A server running Ubuntu 16.04.
- A non-root user with sudo privileges setup on your server.
Installing ArangoDB
Before starting, make sure your server is up-to-date. You can do this with the following commands:
sudo apt-get update -y
sudo apt-get upgrade -y
Next you will need to download the public key from the ArangoDB site to set up the ArangoDB repository.
Run the following command to download the public key:
curl -O https://download.arangodb.com/arangodb32/xUbuntu_16.04/Release.key
Now add the key with the following command:
sudo apt-key add - < Release.key
Next add the ArangoDB repository to sources.list and update the system again:
echo 'deb https://download.arangodb.com/arangodb32/xUbuntu_16.04/ /' | sudo tee /etc/apt/sources.list.d/arangodb.list
sudo apt-get install apt-transport-https
sudo apt-get update
Now install ArangoDB with the following command:
sudo apt-get install arangodb3=3.2.6
Once installation is complete, verify the status with the following command:
sudo systemctl status arangodb
You should see the following output:
● arangodb3.service - LSB: arangodb
   Loaded: loaded (/etc/init.d/arangodb3; bad; vendor preset: enabled)
   Active: active (running) since Tue 2016-11-01 13:27:55 IST; 15s ago
     Docs: man:systemd-sysv-generator(8)
    CGroup: /system.slice/arangodb3.service
           ├─2676 /usr/sbin/arangod --uid arangodb --gid arangodb --pid-file /var/run/arangodb/arangod.pid --temp.path /var/tmp/arangod --log.foregro
           └─2677 /usr/sbin/arangod --uid arangodb --gid arangodb --pid-file /var/run/arangodb/arangod.pid --temp.path /var/tmp/arangod --log.foregro

Nov 01 13:27:50 Node1 systemd[1]: Starting LSB: arangodb...
Nov 01 13:27:50 Node1 arangodb3[2611]:  * Starting arango database server arangod
Nov 01 13:27:55 Node1 arangodb3[2611]: {startup} starting up in daemon mode
Nov 01 13:27:55 Node1 arangodb3[2611]:    ...done.
Nov 01 13:27:55 Node1 systemd[1]: Started LSB: arangodb.
Nov 01 13:27:55 Node1 arangodb3[2611]: changed working directory for child process to '/var/tmp'
Accessing ArangoDB Shell
ArangoDB comes with arangosh that provides a command line shell to access the database. You can create new databases, users, collections, documents, and perform all administrative tasks using this client.
You can launch ArangoDB command line interface by running the following command:
arangosh
At the password prompt, enter your root password, you should see the following output:
Please specify a password:

                                   _
  __ _ _ __ __ _ _ __   __ _  ___  ___| |__
 / _` | '__/ _` | '_ \ / _` |/ _ \/ __| '_ \
| (_| | | | (_| | | | | (_| | (_) \__ \ | | |
 \__,_|_|  \__,_|_| |_|\__, |\___/|___/_| |_|
                       |___/

arangosh (ArangoDB 3.0.10 [linux] 64bit, using VPack 0.1.30, ICU 54.1, V8 5.0.71.39, OpenSSL 1.0.2g-fips  1 Mar 2016)
Copyright (c) ArangoDB GmbH

Pretty printing values.
Connected to ArangoDB 'http+tcp://127.0.0.1:8529' version: 3.0.10 [server], database: '_system', username: 'root'

Type 'tutorial' for a tutorial or 'help' to see common examples
127.0.0.1:8529@_system>
If you want to get any help, run the following command:
127.0.0.1:8529@_system>db._help();
Working with ArangoDB
You can also create your own database and add a user to it.
For example, create a user with name user1 and password password with the following command:
127.0.0.1:8529@_system> require("org/arangodb/users").save("user1", "password");
{
  "user" : "user1",
"active" : true,
"extra" : {
  },
  "changePassword" : false,
  "code" : 201
}
By default users will not have permissions to access any databases, you will need to grant access rights to it.
Lets give 'user1' permissions to access the _system() DB:
127.0.0.1:8529@_system> require("org/arangodb/users").grantDatabase("user1","_system");
You can also revoke the access to a database for a user with the following command:
127.0.0.1:8529@_system> require("org/arangodb/users").revokeDatabase("user1","_system");
If you want to change an existing ArangoDB user's password, run the following command:
127.0.0.1:8529@_system> require("org/arangodb/users").update("user1", "new_password");
{
  "user" : "user1",
  "active" : true,
 "extra" : {
  },
  "changePassword" : false,
  "code" : 200
}
To list out all the existing users of the database, run the following command:
127.0.0.1:8529@_system> require("org/arangodb/users").all();
To remove user1 from database, run the following command:
127.0.0.1:8529@_system> require("org/arangodb/users").remove("user1");
ArangoDB Web Interface
ArangoDB comes with built-in, user friendly web interface for performing administrative tasks.
You will need to make some changes in the ArangoDB configuration files in order to access web interface.
Open the arangod.conf file located in the /etc/arangodb3/ directory:
sudo nano /etc/arangodb3/arangod.conf
Change the following line with IP address of your server:
endpoint = tcp://192.168.1.227:8529
Next, open the arangosh.conf file located at /etc/arangodb3/ directory:
sudo nano /etc/arangodb3/arangosh.conf
Change the following line with IP address of your server:
endpoint = tcp://192.168.1.227:8529
authentication = true
Once you are finished restart the arangodb service:
sudo systemctl restart arangodb3
Open your favourite web browser and type the URL http://your-server-ip:8529. This will open up the login screen for the _system db as shown below:

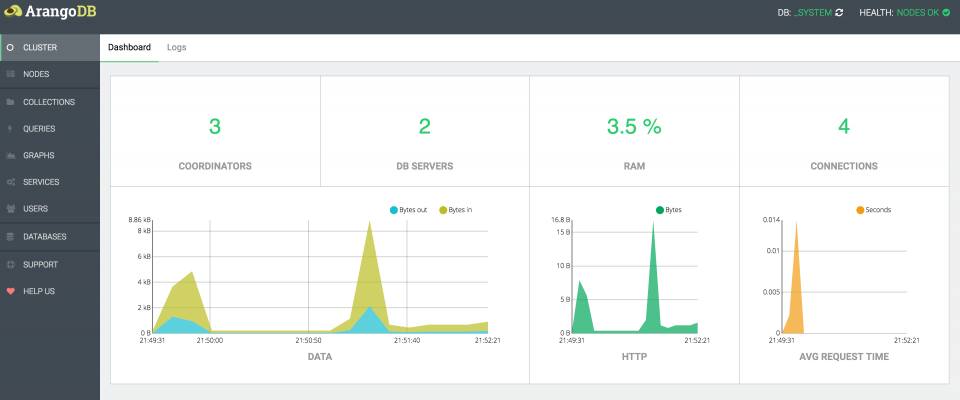
Login using your username and password. You should see a screen like this:

Summary
You have successfully installed the ArangoDB database on your server. You can now easily deploy ArangoDB in a production or development environment. ArangoDB is a powerful database with a wide range of features. It has very good documentation if you want to learn more.

