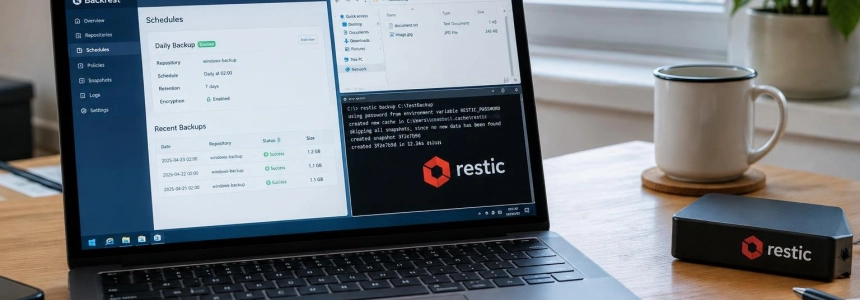
A backup that finishes without errors does not, by itself, prove that you can recover your files. With Backrest, you can schedule Restic backups from a web interface and check the result by restoring a file. The walkthrough below uses a test folder in Windows: this lets you try out the configuration before including important data.
Prepare a folder for testing
Backrest is a management and orchestration interface for Restic: the former organizes repositories, plans, and tasks; the latter runs the backups. The repository stores the data encrypted, and the plan defines which folders to include, when to back them up, and which snapshots to retain. For this exercise, we’ll create Documents\BackrestDemo and a Cache subfolder that we’ll later exclude.
Open PowerShell with your usual user account and run this block. The files contain test data; no additional modules need to be installed.
# Crea una carpeta de documentos y archivos de prueba.
$demo = Join-Path $HOME "Documents\BackrestDemo"
$cache = Join-Path $demo "Cache"

New-Item -ItemType Directory -Force -Path $demo, $cache | Out-Null
Set-Content -Path (Join-Path $demo "nota.txt") -Value "Archivo de prueba para Backrest"
Set-Content -Path (Join-Path $cache "temporal.txt") -Value "Este archivo se excluirá"
Check that both files exist. In the Backrest plan, you’ll include the main folder and exclude Cache; this will let you verify later that the exclusion was applied.
# Muestra el contenido, incluida la carpeta que se excluirá.
$demo = Join-Path $HOME "Documents\BackrestDemo"
Get-ChildItem -Path $demo -Recurse -File | Select-Object FullName, Length
Install Backrest and open the dashboard
Download the Windows installer for your architecture from the Backrest project’s releases page and run it. The installer is called Backrest-setup-[arch].exe; the project says it places Backrest and a tray application in the user’s local programs folder. The tray application is configured to start when you sign in to Windows and monitor Backrest.
In the setup described by SoftZone, the installer offers the option to enable automatic startup, and the dashboard is available at localhost:9898. The project documentation says that the initial setup prompts you to create a username and password. Open the dashboard in your browser, complete that sign-in, and name the instance if the option appears.
# Abre el panel local de Backrest en el navegador predeterminado.
Start-Process "http://localhost:9898"
Backrest can manage an existing repository or create a new one. For this exercise, create a new one and choose a connected external drive as the destination. Give it a name that will help you identify it, select the location, and set a password. Don’t save that password only on the computer you’re backing up: without it, you won’t be able to access the encrypted repository if the computer fails.
If you enable Auto Unlock, the SoftZone guide presents it as a convenience for a single local computer. That option is no substitute for keeping the password in a safe, separate location. The password cannot be recovered if you lose your only copy; without it, the repository becomes inaccessible.
Configure the plan and retention
With the repository created, add a backup plan. Select the Documents\BackrestDemo folder and configure an exclusion for its Cache subfolder. Backrest lets you define these elements through the interface: there’s no need to manually build a Restic command or use Task Scheduler to maintain the schedule.
As an example schedule, SoftZone configures a backup every 12 hours, according to the local clock. Its reference retention policy keeps 24 hourly, 30 daily, 4 weekly, and 12 monthly snapshots. You can use those values to reproduce the configuration described, adjusting the selection in the plan options shown by your installation.
Retention determines which snapshots are kept; the destination and password belong to the repository. Keeping these settings in their respective places helps avoid confusing the data location with the backup frequency. Before creating an actual snapshot, run Dry Run Backup: this action checks the files and shows the scope of the task without saving a backup.
The workflow is as follows: prepare the files, install and open Backrest, create the repository, define the plan, preview it, and then check a restoration.
flowchart TD
    A["Preparar carpeta de prueba"] --> B["Instalar y abrir Backrest"]
    B --> C["Crear repositorio cifrado"]
    C --> D["Definir carpeta y exclusión"]
    D --> E["Configurar horario y retención"]
    E --> F["Ejecutar Dry Run Backup"]
    F --> G["Crear copia y probar restauración"]
Review maintenance and run the backup
The repository also has maintenance tasks. In the reference configuration, SoftZone schedules Check to verify integrity and Prune to remove data that is no longer referenced by older snapshots; both run every 30 days. Retention, on the other hand, is set in the plan. Check that these operations are configured and that the plan shows the selected schedule.
Once Dry Run confirms that the folder and exclusion are as expected, run the first backup from Backrest. You can check the test folder from PowerShell to see which files should be included. You shouldn’t expect to find Cache in the backup: you deliberately excluded it.
# Comprueba los archivos del conjunto de prueba antes de compararlos
# con el contenido mostrado por el navegador de instantáneas.
$demo = Join-Path $HOME "Documents\BackrestDemo"
Get-ChildItem -Path $demo -Recurse -File | ForEach-Object {
    [PSCustomObject]@{
        Ruta = $_.FullName
        Bytes = $_.Length
    }
}
The schedule, backup task, and maintenance are all managed from Backrest. This centralization means you don’t have to coordinate a backup plan with a second scheduling tool, which SoftZone notes as a difference from options that delegate automation separately.
Practice a restoration and avoid common mistakes
Open Snapshot Browser, browse the snapshot, and restore nota.txt to a location other than the original folder. Backrest lets you browse the saved tree and restore files to a specific location. Check that the restored file opens; this test tells you more than simply verifying that the task is marked as complete.
To practice checking from PowerShell, change the example path to the destination folder you chose for the restoration. The command displays the file if the restoration placed it there; it doesn’t replace visually checking its contents.
# Cambia esta ruta por el destino elegido en Snapshot Browser.
$restaurado = Join-Path $HOME "Documents\BackrestRestaurado\nota.txt"

if (Test-Path -LiteralPath $restaurado) {
    Get-Content -LiteralPath $restaurado
} else {
    Write-Error "No se encontró el archivo restaurado en la ruta indicada."
}
There are three easy-to-overlook mistakes. First, losing the password: store it in a secure manager separate from the computer and backup drive. Second, accidentally including temporary files: use Dry Run Backup and confirm that Cache is excluded. Third, trusting the log of a run without testing recovery: restore a file after the initial setup and repeat the test periodically.
The example uses a local external drive, as in the configuration described by SoftZone. Restic supports other destinations, but this walkthrough does not configure remote storage. When you finish testing, replace the practice folder with the folders you actually want to protect, and keep a secure copy of the repository password.