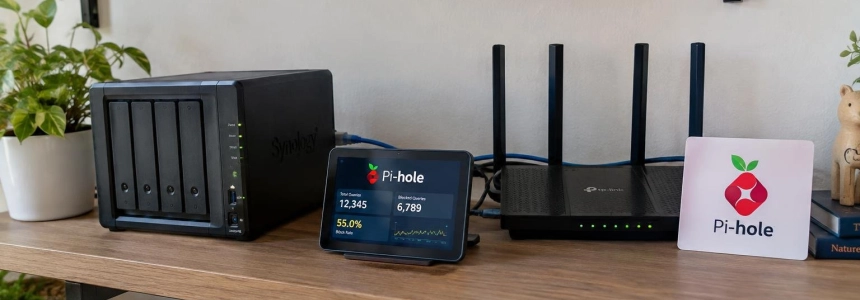
A Pi-hole container on a NAS can filter ad and tracker requests for phones, TVs, and other devices in your home—not just a computer’s browser. The requirement is that those devices use Pi-hole as their DNS: the container receives the queries, blocks domains on its lists, and forwards the rest to an external resolver.
Setup has two parts: publish the container’s DNS service and configure the router to give devices the NAS address as their DNS server. Pi-hole does not remove every ad: it cannot filter content served from the same domain as a website or app, and some devices may bypass the network’s DNS.
flowchart TD
    A["Dispositivo de casa"] --> B["DNS de Pi-hole"]
    B --> C{"Dominio en lista de bloqueo"}
    C -->|"Sí"| D["Respuesta no enrutable"]
    C -->|"No"| E["Resolver DNS externo"]
    E --> F["Respuesta al dispositivo"]
1. Prepare the NAS and DNS
Before starting the container, reserve a stable IP address for the NAS. You’ll need it to configure the router and prevent the DNS address devices receive from changing. The steps for reserving it depend on the NAS and router.
The container must publish port 53 for both TCP and UDP, which Pi-hole uses for DNS queries. Port 80 lets you open the administration panel. The Compose file also stores Pi-hole’s data in a local folder so it persists when you update the container.
2. Define the container with Docker Compose
Create a folder for the deployment and save this file in it as compose.yaml. Change the time zone and password to values appropriate for your setup. Do not leave the example password in use.
services:
  pihole:
    container_name: pihole
    image: pihole/pihole:latest
    ports:
      - "53:53/tcp"
      - "53:53/udp"
      - "80:80/tcp"
    environment:
      TZ: 'Europe/Madrid'
      FTLCONF_webserver_api_password: 'cambia-esta-contrasena'
      FTLCONF_dns_listeningMode: 'ALL'
    volumes:
      - './etc-pihole:/etc/pihole'
    restart: unless-stopped
The image is the official pihole/pihole. The ALL option configures the DNS listening mode recommended in the documentation for the default Docker bridge network. The ./etc-pihole volume keeps the database and common configuration between updates.
This configuration does not enable Pi-hole as a DHCP server, so it does not add port 67 or the NET_ADMIN capability. The documentation reserves those for cases where Pi-hole will also manage DHCP. You also do not need to mount /etc/dnsmasq.d to start from scratch with Pi-hole 6.
3. Start and check the service
From the folder containing compose.yaml, start the container in the background with Docker Compose:
docker compose up -dThen check the status from inside the container using the Pi-hole command. If the service is running, the output lets you verify that Pi-hole is responding as an active installation.
docker exec pihole pihole statusIf you need to check which versions of Pi-hole, the web interface, and FTL are installed, query the version from the same container:
docker exec pihole pihole versionThe web panel is available at the NAS IP address, using port 80. For example, if the NAS has the illustrative address 192.168.1.42, open http://192.168.1.42/admin in a browser on the local network and sign in with the configured password.
4. Direct DNS queries to the NAS
In the router’s DHCP settings, set the NAS IP as the primary DNS. This way, devices that get their network settings from the router will send queries to Pi-hole. Option names and their locations vary by device, so there is no single menu setting that works for everyone.
If you’d rather test before changing the router, manually set the DNS address for one device only in its Wi-Fi settings. Check that it can browse the web and that its queries appear in the Pi-hole panel; then you can extend the change to the network. This alternative also helps identify problems without changing the rest of your home’s configuration.
Pi-hole responds to blocked domains with an unroutable address: in the default NULL mode, it uses 0.0.0.0 or ::. If the domain is not blocked, it forwards the query to the configured external DNS resolver. This cutoff prevents the device from connecting to the blocked domain.
5. Investigate issues instead of blocking blindly
An aggressive blocklist can break a specific feature. In the case described by XDA, Disney Plus would keep loading or show a black screen during ad breaks when Pi-hole blocked the ad delivery domain, even though the main stream was still available. Google sponsored links may also stop working if their domain is blocked.
To diagnose the issue, open the query logs in the panel and filter by the local IP or name of the affected device. Reproduce the problem while watching recent queries. If you identify a legitimate domain that Pi-hole has blocked, use the option to allow it next to that query; the change should apply across the network.
Filtering does not cover every device either: queries sent through encrypted DNS or hardcoded servers may bypass Pi-hole. And if an ad or unwanted content comes from the same domain as the main service, DNS blocking may affect that service too instead of removing only the ad.
What to check before calling it done
Confirm that the container is still running, that the NAS has kept the same IP, and that the router—or test device—is using that address as its DNS server. The panel provides real-time and historical logs to review which domains devices query and which requests are blocked.
With the NAS serving as the network’s DNS, there is no need to install an ad blocker on every device that supports this configuration. The next practical step is to test the apps you use most and allow only the blocked domains you need to restore a specific feature.