Syncthing is a free continuous file synchronization tool that lets you synchronize your files across desktops, tablets, servers. It’s an open source alternative to the popular BitTorrent Sync (aka btsync) application. The creation, modification or deletion of files on one machine will automatically be replicated to your other devices. Syncthing does not upload your data to the cloud but exchange your data directly between your devices. All your data is encrypted when transmitting between your devices.
Install Syncthing on Ubuntu 16.04 via Official Deb Repository
Use curl to download the Syncthing GPG key then import the key to Ubuntu system with apt-key.
sudo apt-get install curl

curl -s https://syncthing.net/release-key.txt | sudo apt-key add -
-s option enables silent mode.
If you see OK in the terminal, that means the GPG key is successfully imported. Then add official Syncthing deb repository with the following command.
echo "deb http://apt.syncthing.net/ syncthing release" | sudo tee /etc/apt/sources.list.d/syncthing.list
Update local package index and install Syncthing on Ubuntu 16.04 LTS.
sudo apt-get update

sudo apt-get install syncthing
This deb repository also works on Debian or other Debian/Ubuntu-based Linux distros such as Linux Mint, Elementary OS.
Set Up Syncthing as a Systemd Service
The official Syncthing deb package ships with the needed systemd service file. Under /lib/systemd/system/ directory, you will find a [email protected] file. Enable syncthing to auto start when Ubuntu is booted up by running the below command. Replace username with your actual username.
sudo systemctl enable syncthing@username.service
The above command will create a symbolic link that points to the [email protected] file.
Created symlink from /etc/systemd/system/multi-user.target.wants/[email protected] to /lib/systemd/system/[email protected].
Now we can start the Syncthing service with the following command.
sudo systemctl start syncthing@username.service
Check status
systemctl status syncthing@username.service
Output:
● [email protected] - Syncthing - Open Source Continuous File Synchronization for linuxbabe
   Loaded: loaded (/lib/systemd/system/[email protected]; enabled; vendor preset: enabled)
   Active: active (running) since 六 2016-06-04 17:16:20 CST; 31s ago
     Docs: man:syncthing(1)
 Main PID: 5586 (syncthing)
   CGroup: /system.slice/system-syncthing.slice/[email protected]
    └─5586 /usr/bin/syncthing -no-browser -no-restart -logflags=0
We can see that Syncthing auto start is enabled and it’s running. Now in your Web browser’s address bar, type 127.0.0.1:8384 to access the Syncthing Web interface. You can add other Syncthing devices and share folders with them. The default syncing folder is ~/Sync

Configure Syncthing
We can now edit the configuration file that was created. Open the file in your text editor:
nano ~/.config/syncthing/config.xml
Look for a section that deals with the GUI. It should look like this:
127.0.0.1:8080
The only change that we need to make is to replace the localhost address (127.0.0.1) with 0.0.0.0, which represents all network interfaces. This section will look like this when you are finished:
0.0.0.0:8080
Save and close the file when you are finished. We will do more extensive configuration later on through the web interface.
Setting Up Security in the Web UI
We are finally ready to configure our instances through the web user interface.
Log into each of your servers' Syncthing interfaces by visiting their public IP addresses and port 8080:
http://server1_public_IP:8080
http://server2_public_IP:8080
You will see the main Syncthing screen:

The first thing that we need to do is add some security to our interface. Go to the "Edit" menu in the upper right-hand corner and click on the "Settings" selection:

On the right side, we need to set up a username and password for the web interface. We also want to enable TLS encryption for our sessions so that our traffic cannot be intercepted in transit by checking the "HTTPS" box:

When you are finished, click the "Save" button at the bottom.
You will see a message that prompts you to restart the service for the changes to take affect:

Click on the "Restart" button.
You will probably need to refresh the page for the changes to reload properly. When you do so, you will most likely encounter an SSL warning that looks like this:

This is just letting you know that the entity that signed the SSL certificate is not in your browser's list of trusted certificate authorities. This is expected since the certificates are self-signed. It is safe to click on "Proceed anyway" to continue.
You will then get an authentication prompt for the username and password that you configured:

Fill out the appropriate values and log in. Your interface is now more secure from outside traffic.
Complete these steps on both servers.
Connecting the Two Servers and Sharing Directories
In order to share content, Syncthing requires both ends of the connection to add the other server to their list of nodes. Then, both sides must also add a repository (directory) to synchronize.
To add a node, you will need the companion node's ID. You can get this ID by going to the "Edit" menu in the upper-right corner and selecting the "Show ID" option.
This will bring up an overlay with a long ID that you can copy. It will also give you a QR code in case you are configuring smart phone application. Copy the ID of the first node.

On the second server, click on the "Edit" menu and select "Add Node".
An overlay will appear with fields that you must configure to add the other server. In the "Node ID" field, paste the ID that you copied from the first server. In the "Node Name" field, select any descriptive name that you would like to use for your other server. Leave the "Addresses" as "dynamic":

When you are finished, click "Save" to add the new node.
Run through this same process in the reverse order so that both of the servers have the opposite server in their configuration. For the moment, ignore any requests to restart the service, because we will be making a few more additional changes first.
In the web interface, the nodes that you are connected to are shown on the right side. The repositories you are sharing are listed on the left. By default, a folder called Sync will be created in your home directory to act as the default repository. If the menu is compressed, click the name to expand the listing:
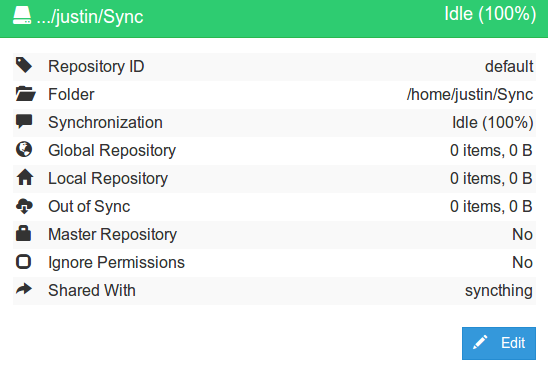
Click on the "Edit" button to configure the repo. Towards the bottom, you will have the option to share this repository with any of the nodes that you have configured. Check the box associated with the opposite node and then click the "Save" button:

Now, you can click on the "Restart" button to implement your changes:
Now, any changes made in the ~/Sync directory will be mirrored to the opposite server. By default, this will sync every 60 seconds, but this can be changed in the "Settings" menu.
You can add additional directories that you wish to mirror by choosing the "Add Repository" option from the "Edit" menu. The "Repository ID" must be the same on each of the servers for the directories to be associated.
Install Syncthing on Android
You can get Syncthing from Google Play store.
I hope this post helped you to install Syncthing on Ubuntu 16.04. Comments, questions or suggestions are always welcome. If you found this post useful, ? please share it with your friends on social media! Stay tuned for more Linux tutorials.