Nowadays anyone can create their own website easily and free of charge. Whether through a CMS (such as WordPress) or by hand with HTML, CSS and JavaScript, in a few minutes we can have a more or less functional website up and running. However, in order to test that everything works perfectly, and allow others to access it remotely, it is necessary to have a server. And, although the most widespread is to have a server in the cloud, there is a tool that allows us to convert our PC into a server in a very simple way: XAMPP.
What is XAMPP?
This is a completely free and open source tool designed to set up a fully functional web server, with its corresponding backend, on any computer. This tool is not intended for large-scale use, but it is essential for any testing environment, and can work without problems in small environments.
XAMPP stands for X (since it does not have a specific operating system), Apache (web server), MariaDB (database server), PHP (backend server) and Perl. This project has been running for more than 10 years, and has thousands of users around the world using it for all kinds of purposes.
We can mount this server without problems in Windows, Linux and macOS. In addition, as we will see below, we can find it with different versions of PHP so that we can have an experience as close as possible to how the web would work on a real server.
Download and install
We can download this program completely free of charge from this link. The download, as we have already explained, is totally free, and has neither hidden payments nor adware or unwanted software. We select the version that corresponds to our operating system, and the PHP version we want to use. In our case we are going to download the one that corresponds to the last update of the backend.

The only requirement to be able to use this tool is to use a version of Windows superior to XP or Server 2003. Although, if for some remote case we use one of these versions, we can also download an older version of the server to work on these obsolete systems.
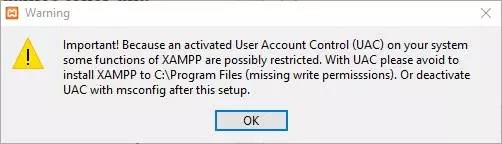
Download the installer, which occupies between 151 and 165 megabytes (depending on the version) and that's it. Now we execute the .exe file that we have downloaded and the installation will start. If we have a user account control (UAC) activated in our PC we will see a warning like the following one that will recommend us not to install XAMPP in "Program Files" to avoid permissions problems.
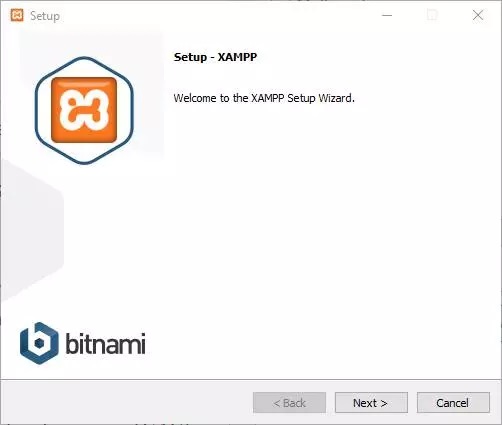
The installation wizard will start.
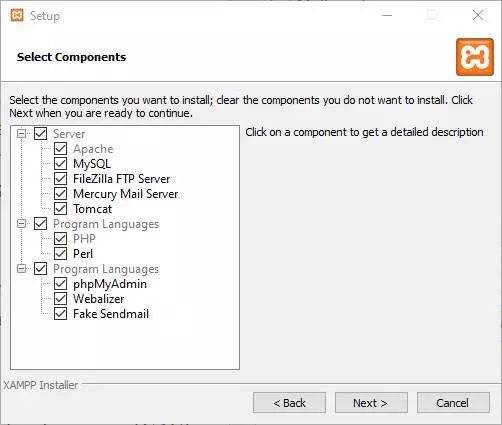
In the next step we can choose what we want to install. The only mandatory is Apache and PHP, although we recommend installing all services to avoid problems of any kind when setting up a website or, as we will see later, installing add-ons.
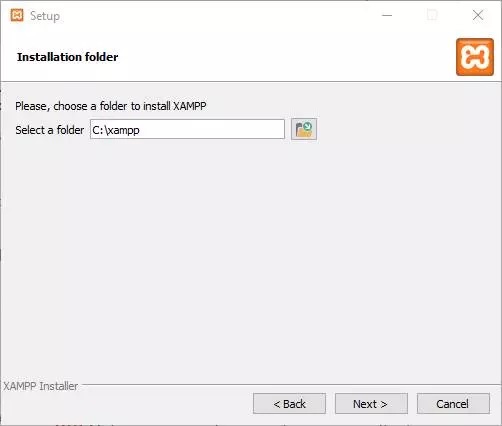
In the next step we will have to specify the installation directory. XAMPP is "portable", so we can install it in a USB memory and take it always with us. Although, yes, we may have some problems depending on the type of PC where we install it.
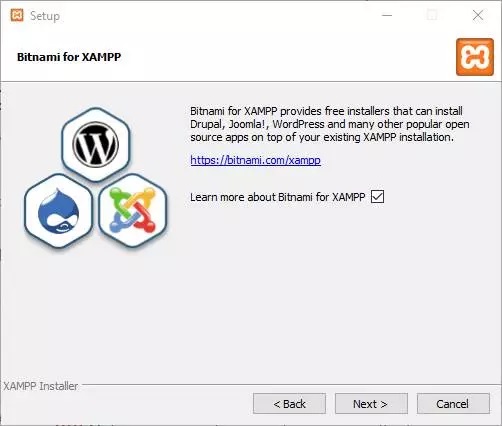
Now we will find a notice telling us that, thanks to Bitnami, we can install CMS like Joomla!, Drupal or WordPress with a simple installer to be able to use it inside XAMPP. Later we will see how this works.
Everything is ready, and we can start with the installation. This is quick, and will take no more than a minute.
When finished, we will have our XAMPP ready to start working.
How to configure and use XAMPP
Now we can launch XAMPP from its launcher, called "xampp-control.exe". From it we will open the program's configuration panel, and we will see a window like the following one.
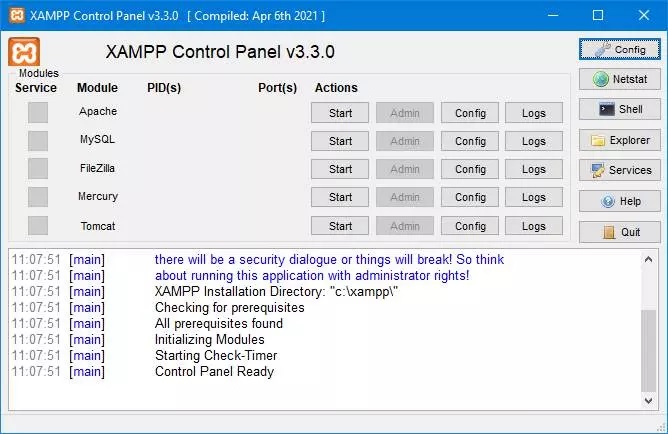
As we can see, in this window we have all the tools and services we may need to get our web up and running. By default, the servers will be stopped, and we will have to launch them as we need them through the "Start" button that appears next to each one. Of course, when we launch them for the first time we may see a firewall warning, having to give permission for them to connect.
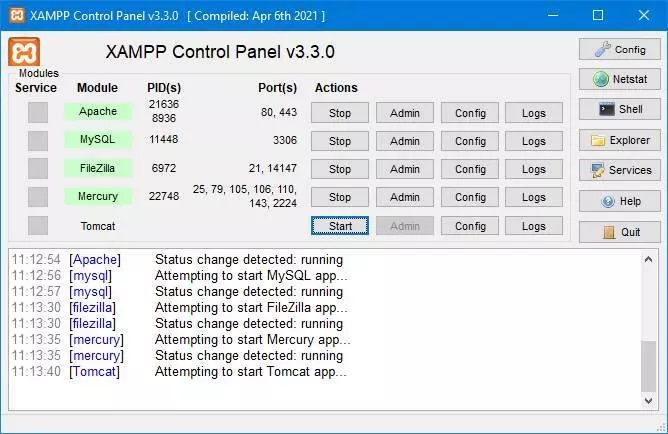
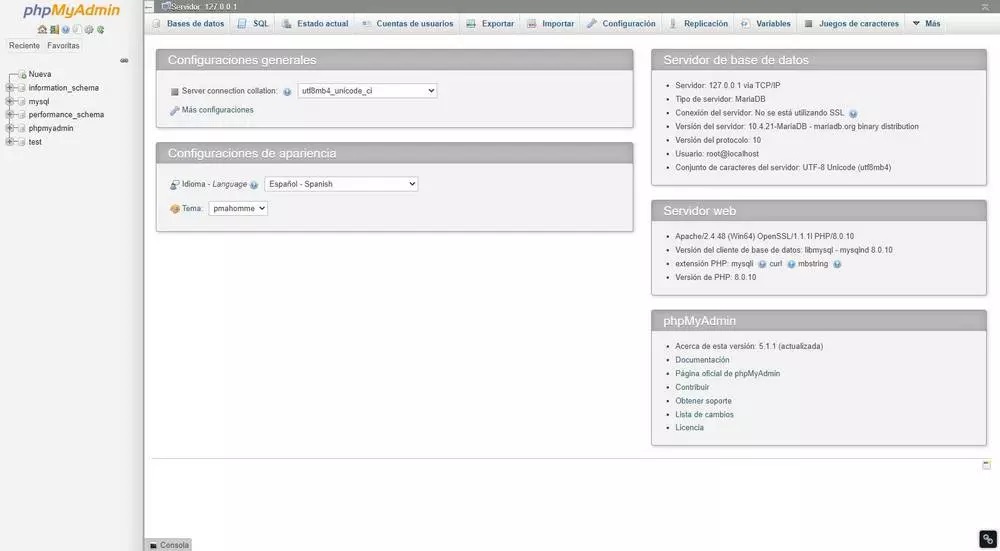
From the "Admin" button that appears next to each of the started services we can access the configuration of each of the servers. For example, we can configure the FTP server, or enter the phpMyAdmin to configure the databases.
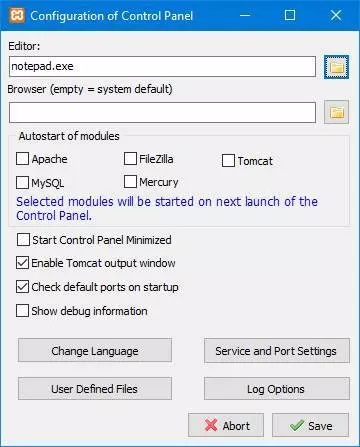
The "Config" button allows us to open each of the server configuration files to have a more specific configuration of them. For example, in the case of MySQL, we will open my.ini. In addition, the XAMPP control panel itself has its own configuration from which, among other things, we can choose which servers we want to start at startup or change the ports of the servers.
We have everything ready. Now we can enter our local IP, in 127.0.0.1 or through http://localhost/ to access the server and load the web that we have mounted on it.