
The LEMHH software stack is a group of software that can be used to serve dynamic web pages and web applications. This is an acronym that describes a Linux operating system, with an Nginx web server. The backend data is stored in MySQL and the dynamic processing is handled by HHVM.
In this guide, we will demonstrate how to install a LEMHH stack on an Ubuntu 14.04 server. The Ubuntu operating system takes care of the first requirement. We will describe how to get the rest of the components up and running.
HHVM is an open source virtual machine for executing PHP and Hack code. HHVM is developed and supported by Facebook, a fact which draws more and more attention to HHVM lately.
HHVM is different from other PHP engines because of its just-in-time (JIT) compilation approach. HHVM compiles PHP code into an intermediate byte code and then directly into x64 machine instructions. This allows more optimizations and higher performance compared to the way other engines work.
HHVM is powerful and fast, but it's also demanding in terms of resources, just as any other virtual machine (e.g. JVM). Thus, HHVM requires more RAM and CPU in comparison to other more lightweight PHP interpreters such as PHP-FPM. Our tests showed that decent performance requires a Droplet with at least 1 GB RAM.
In this article we'll show you how to install Nginx and HHVM.
Prerequisites
Before you complete this tutorial, you should have a regular, non-root user account on your server with sudo privileges.
Once you have your account available, sign into your server with that username. You are now ready to begin the steps outlined in this guide.
This guide has been tested on Ubuntu 14.04. The described installation and configuration would be similar on other OS or OS versions, but the commands and location of configuration files may vary.
For this tutorial, you will need:
- Ubuntu 14.04 Droplet with a minimum of 1 GB of RAM
- A non-root sudo user
- Nginx installed
All the commands in this tutorial should be run as a non-root user. If root access is required for the command, it will be preceded by sudo.
Step One — Install the Nginx Web Server
In order to display web pages to our site visitors, we are going to employ Nginx, a modern, efficient web server.
All of the software we will be getting for this procedure will come directly from Ubuntu's default package repositories. This means we can use the apt package management suite to complete the installation.
Since this is our first time using apt for this session, we should start off by updating our local package index. We can then install the server:
sudo apt-get update
sudo apt-get install nginx
In Ubuntu 14.04, Nginx is configured to start running upon installation.
You can test if the server is up and running by accessing your server's domain name or public IP address in your web browser.
If you do not have a domain name pointed at your server and you do not know your server's public IP address, you can find it by typing one of the following into your terminal:
ip addr show eth0 | grep inet | awk '{ print $2; }' | sed 's/\/.*$//'
111.111.111.111
fe80::601:17ff:fe61:9801
Or you could try using:
curl http://icanhazip.com
111.111.111.111
Try one of the lines that you receive in your web browser. It should take you to Nginx's default landing page:
http://server_domain_name_or_IP
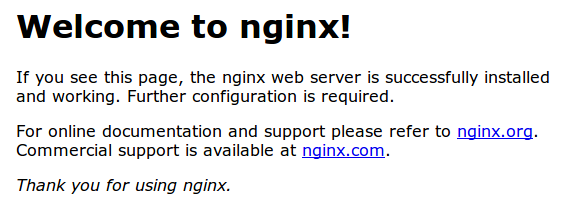
If you see the above page, you have successfully installed Nginx.
Step Two — Install MySQL to Manage Site Data
Now that we have a web server, we need to install MySQL, a database management system, to store and manage the data for our site.
You can install this easily by typing:
sudo apt-get install mysql-server
You will be asked to supply a root (administrative) password for use within the MySQL system.
The MySQL database software is now installed, but its configuration is not exactly complete yet.
First, we need to tell MySQL to generate the directory structure it needs to store its databases and information. We can do this by typing:
sudo mysql_install_db
Next, you'll want to run a simple security script that will prompt you to modify some insecure defaults. Begin the script by typing:
sudo mysql_secure_installation
You will need to enter the MySQL root password that you selected during installation.
Next, it will ask if you want to change that password. If you are happy with your MySQL root password, type "N" for no and hit "ENTER". Afterwards, you will be prompted to remove some test users and databases. You should just hit "ENTER" through these prompts to remove the unsafe default settings.
Once the script has been run, MySQL is ready to go.
Step Three — Install HHVM
For Ubuntu 14.04 there is an officially supported HHVM repository. To add this repository you have to import its GnuPG public keys with the command:
sudo apt-key adv --recv-keys --keyserver hkp://keyserver.ubuntu.com:80 0x5a16e7281be7a449
After that you can safely install HHVM's repository with the command:
sudo add-apt-repository "deb http://dl.hhvm.com/ubuntu $(lsb_release -sc) main"
Once you have the repository added you have to make apt, Ubuntu's software manager, aware that there are new packages which can be installed with it. This can be done by updating apt's cache with the command:
sudo apt-get update
Finally, you can install HHVM with the command:
sudo apt-get install hhvm
The above command installs HHVM and starts it for the first time. To make sure HHVM starts and stops automatically with the Droplet, add HHVM to the default runlevels with the command:
sudo update-rc.d hhvm defaults
Configuration
HHVM comes with a script which makes the integration with Nginx very easy. Provided you have a default Nginx installation, you can run the script without any arguments like this:
sudo /usr/share/hhvm/install_fastcgi.sh
When run, this script adds the configuration file /etc/nginx/hhvm.conf to the default Nginx server block configuration /etc/nginx/sites-enabled/default. It works only with a default Nginx configuration without any FastCGI configurations.
If you have already modified your default server block with custom FastCGI configuration, such as the one for PHP-FPM, then you will have to manually replace your previous FastCGI configuration with this one:
location ~ \.(hh|php)$ {
    fastcgi_keep_conn on;
    fastcgi_pass   127.0.0.1:9000;
    fastcgi_index  index.php;
    fastcgi_param  SCRIPT_FILENAME $document_root$fastcgi_script_name;
    include        fastcgi_params;
}
The above means that Nginx should use HHVM to process any .php or .hh (hack) requested file.
You will also need to restart Nginx to enable the change:
sudo service nginx restart
It also assumes that you haven't changed the default HHVM configuration that makes the service accessible at 127.0.0.1:9000. This setting comes from the main HHVM configuration file /etc/hhvm/server.ini which contains:
; php options

pid = /var/run/hhvm/pid

; hhvm specific

hhvm.server.port = 9000
hhvm.server.type = fastcgi
hhvm.server.default_document = index.php
hhvm.log.use_log_file = true
hhvm.log.file = /var/log/hhvm/error.log
hhvm.repo.central.path = /var/run/hhvm/hhvm.hhbc
In the above configuration you may notice the variable hhvm.server.port which determines that HHVM will be listening on TCP port 9000. Furthermore, unless otherwise specified, it will listen on localhost by default.
HHVM is considered for environments under heavy load so the first configuration change you can do is to make HHVM listen to a socket instead of a TCP port. Thus, the communication between Nginx and HHVM will require less CPU and memory.
To configure HHVM to listen on a socket, open the file /etc/hhvm/server.ini in your favorite editor such as with vim:
sudo vim /etc/hhvm/server.ini
Then remove the line starting with hhvm.server.port, and in its place add the following one:
hhvm.server.file_socket=/var/run/hhvm/hhvm.sock
Save the configuration file, and restart HHVM with the command:
sudo service hhvm restart
Next, you have to make Nginx aware of this change. For this purpose open the file /etc/nginx/hhvm.conf for editing:
sudo vim /etc/nginx/hhvm.conf
In this file make sure that the fastcgi_pass directive points to the HHVM socket and looks like this:
fastcgi_pass unix:/var/run/hhvm/hhvm.sock;
You will have to restart Nginx too for this change to take effect. For this purpose use the command:
sudo service nginx restart
The script /usr/share/hhvm/install_fastcgi.sh can save you some time, but there are things you have to adapt manually, especially in regards to your Nginx server blocks. For example, the default server block configuration opens as index files only index.html and index.htm files while directory listing is forbidden. This is one thing you should change for sure and include index.php files as index files too. To do this open again the configuration file for the default server block with your favorite editor:
sudo vim /etc/nginx/sites-enabled/default
Then go to the server part and add index.php at the line with indexes so that it looks like this:
index index.html index.htm index.php;
Restart again Nginx for this setting to take effect:
sudo service nginx restart
Testing and Tweaking HHVM
The first test you can perform is with the PHP command line interface (cli) /usr/bin/php which points to /etc/alternatives/php, which in term points to the HHVM binary /usr/bin/hhvm.
/usr/bin/php --version
When you run the above command you should see printed HHVM's version and repository information like this this:
HipHop VM 3.8.1 (rel)
Compiler: tags/HHVM-3.8.1-0-g3006bc45691762b5409fc3a510a43093968e9660
Repo schema: 253b3802ce1bcd19e378634342fc9c245ac76c33
If you have had PHP installed before HHVM, you may still see the output from the old PHP. To change this and make it point to HHVM run the command:
sudo /usr/bin/update-alternatives --install /usr/bin/php php /usr/bin/hhvm 60
Next, you can use the well-known phpinfo() function to see HHVM's settings and options. For this purpose create a new file called info.php inside your default document root — /usr/share/nginx/html with your favorite editor.
sudo vim /usr/share/nginx/html/info.php
The new file should contain:
<?php
phpinfo();
?>
It is always a good practice to make sure that all Nginx web files are owner by the Nginx user www-data. Thus change the ownership of this file to www-data with the command:
sudo chown www-data: /usr/share/nginx/html/info.php
Now try to access this file at your Droplet's IP. The URL to put in your browser should look like http://your_server_ip/info.php.
The result in your browser should look like this:

If you don't see a similar page then first make sure that you have followed correctly the installation instructions from the prerequisites. Second, look for errors in the error log of Nginx (/var/log/nginx/error.log) and HHVM (/var/log/hhvm/error.log).
Going back to your browser, you may notice that this page is similar to the one produced by phpinfo() with the usual PHP. In fact, most of the variables are identical to those from the usual PHP with the exception of the HHVM-specific variables starting with the hhvm. prefix.
While exploring the variables note that memory limit is equal to 17179869184 bytes which is a little bit over 17 GB. Such a high memory resource limit will certainly kill a Droplet with a few GB of RAM, making it unresponsive. You should decrease this value to a value lower than the available RAM of your Droplet to ensure that other services on the Droplet will not suffer from lack of RAM.
As a general example, if your Droplet has 2GB of RAM it should be safe to dedicate around 1.2 GB to HHVM. To make this happen, edit the file /etc/hhvm/php.ini with your favorite editor (sudo vim /etc/hhvm/php.ini) and add a new variable after the ; php options section:
memory_limit = 1200M
In a similar way, you can modify any PHP setting and variable to your needs and liking. Just make sure to restart HHVM after every change with the command:
sudo service hhvm restart
Next, you can perform a more complex test with a common web application. It's important to know that HHVM is not 100% compatible with the usual PHP nor with all popular PHP frameworks. Our tests during the writing of this article showed that many PHP web applications, such as WordPress, seem to work fine. However, officially, the number of supported frameworks is limited.
When you test with a complete framework/web application there should be nothing HHVM-specific to consider. The installation and operational instructions should be the same as for a regular LEMP stack. This is because, by default, HHVM comes bundled with all most PHP modules providing good compatibility.
Still, in some rather rare cases you may need to install an additional module for HHVM. For example, if you use PostreSQL as a database server you will need the pgsql module. In such cases consult first HHVM's official documentation even though it may forward you to a third party resource, such as in the case of pgsql.
Conclusion
As this article showed, HHVM can be easily installed, configured, and integrated with Nginx. If you have enough resources you should definitely give it a try and see how HHVM's unique JIT compiler works for you in terms of performance and stability. There must be a good reason for a site like Facebook with complex functionality and unmatched traffic to trust it. However, for smaller sites with less traffic you may find a lower memory footprint solution such as PHP-FPM still a better choice.