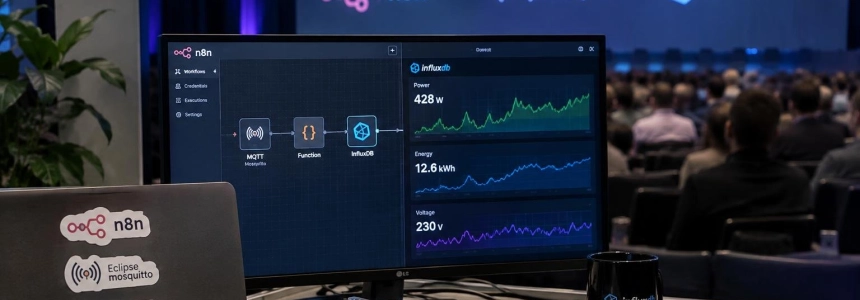
A local energy dashboard can start with three components: an MQTT broker, an n8n workflow, and a time-series database. The workflow receives a power reading, converts it into a record, and sends it to InfluxDB; from there, the series can be queried and visualized.
The n8n template for IoT monitoring already combines an MQTT Trigger, a Code node, and an HTTP request to InfluxDB. Its example uses an ESP32 with a DHT22 sensor, but the template itself proposes adapting the workflow to other MQTT devices. In this tutorial, we’ll use voltage, current, and power readings, like those supported by the reference energy monitor.
The data flow will be MQTT → n8n → InfluxDB. The reference energy monitoring project serves dashboard data through an API; here, the focus is on receiving readings and sending them to InfluxDB.
flowchart LR
  A["Publicador de prueba"] --> B["Mosquitto local"]
  B --> C["MQTT Trigger de n8n"]
  C --> D["Validar y convertir"]
  D --> E["HTTP Request"]
  E --> F["InfluxDB"]
  F --> G["Panel de consultas"]
Start locally with Docker
This Compose file starts n8n, Mosquitto, and InfluxDB on a shared network. Mosquitto listens on local port 1883, the broker also used by the energy monitoring example available on GitHub. Anonymous access is suitable only for this local demonstration: the repository warns that a production deployment must require authentication, topic-based ACLs, and TLS.
services:
  mosquitto:
    image: eclipse-mosquitto:2
    ports:
      - "1883:1883"
    command: ["mosquitto", "-c", "/mosquitto-no-auth.conf"]
    volumes:
      - ./mosquitto.conf:/mosquitto-no-auth.conf:ro

  n8n:
    image: n8nio/n8n:latest
    ports:
      - "5678:5678"
    volumes:
      - n8n_data:/home/node/.n8n

  influxdb:
    image: influxdb:2
    ports:
      - "8086:8086"
    volumes:
      - influxdb_data:/var/lib/influxdb2

volumes:
  n8n_data:
  influxdb_data:
Save the file as compose.yaml. Mosquitto needs an explicit configuration for this setup:
listener 1883
allow_anonymous true
Start the services with docker compose up -d. To connect n8n to InfluxDB, you’ll need the database address and port, the bucket, the organization ID, and a token; the n8n example lists these details for its HTTP request. In this Compose file, InfluxDB uses port 8086.
Publish a test MQTT reading
The topic will follow the pattern devices/{device_uid}/measurements, documented by the GitHub energy monitor. The device ID goes in the topic; the JSON contains the measurements and timestamp. To simulate a device, simply publish a reading manually from Python using Paho MQTT.
python -m pip install paho-mqttimport json
from datetime import datetime, timezone
import paho.mqtt.client as mqtt
broker = "localhost"
topic = "devices/DEV-002/measurements"
reading = {
"voltage": 230.4,
"current": 2.8,
"power": 645.1,
"timestamp": datetime.now(timezone.utc).isoformat()
}
client = mqtt.Client(mqtt.CallbackAPIVersion.VERSION2)
client.connect(broker, 1883, 60)
client.publish(topic, json.dumps(reading), qos=0)
client.disconnect()
print("Lectura publicada:", reading)The topic and reading fields match the telemetry schema in the IoT Energy Monitor repository. Publish the message after activating the workflow; if you send it beforehand, the trigger won’t be listening yet.
Configure the n8n MQTT Trigger
Create a new workflow and add an MQTT Trigger node. In the credentials, set the host to mosquitto and the port to 1883: inside Docker, n8n must use the service name, not localhost. Subscribe it to devices/+/measurements, which captures readings from any device using that structure.
The n8n documentation describes MQTT as a lightweight publish-subscribe protocol and directs users to its MQTT credentials for this node’s authentication. For this local Compose setup, the broker has been left unauthenticated; don’t reuse this configuration outside a test machine.
Add a Code node after the trigger. Since the output property names can depend on how the message reaches the node, first publish a reading and inspect the input item in the n8n execution. The following code accepts either already-parsed JSON or a string in message or payload; it rejects missing fields and negative values before writing.
const input = $input.first().json;
let reading = input;

if (typeof input.message === 'string') {
  reading = JSON.parse(input.message);
} else if (typeof input.payload === 'string') {
  reading = JSON.parse(input.payload);
} else if (input.message && typeof input.message === 'object') {
  reading = input.message;
}

const required = ['voltage', 'current', 'power', 'timestamp'];
for (const key of required) {
  if (!(key in reading)) {
    throw new Error(`Missing field ${key}`);
  }
}

for (const key of ['voltage', 'current', 'power']) {
  if (typeof reading[key] !== 'number' || reading[key] < 0) {
    throw new Error(`Invalid measurement: ${key}`);
  }
}

const timestamp = Date.parse(reading.timestamp);
if (!Number.isFinite(timestamp)) {
  throw new Error('Invalid timestamp');
}

return [{
  json: {
    voltage: reading.voltage,
    current: reading.current,
    power: reading.power,
    timestampSeconds: Math.floor(timestamp / 1000)
  }
}];
Send the data to InfluxDB
Connect an HTTP Request node to the Code node. The n8n template uses that node to send data to InfluxDB and specifies that you need the database URL and port, the bucket, the organization ID, and a token. Configure these values for your local instance and its supported write format.
The following Code node prepares a data string for the request body. Configure the HTTP Request node to match your instance’s write settings and pass that string as the body.
const { voltage, current, power, timestampSeconds } = $input.first().json;
const line = `energy,device=DEV-002 voltage=${voltage},current=${current},power=${power} ${timestampSeconds}`;

return [{ json: { line } }];
The example sets the device to DEV-002, which identifies the MQTT meter in the reference project. To distinguish multiple devices, use an ID controlled by the topic and validate it before adding it as a tag; don’t insert unchecked text from incoming messages.
Check the series and view the dashboard
Activate the workflow and run the publisher again. Check that the readings have been stored in InfluxDB; then query the data and visualize it on the dashboard according to your instance’s configuration.
The n8n template for remote sensors also sends data from the workflow to InfluxDB over HTTP and notes that the data can be displayed in real time. Here, storage keeps voltage, current, and power separate; instantaneous readings alone aren’t enough to determine cumulative consumption in kWh. The reference energy monitor calculates that energy by integrating consecutive samples and omits intervals that are too far apart, rather than assuming a single reading remained constant.
Common issues
If the trigger receives nothing, first check the broker host: in the n8n container it is mosquitto, while the publisher running on the host machine uses localhost. Also check the exact topic and make sure the workflow is active.
If the workflow reaches the HTTP Request node but InfluxDB rejects it, verify the organization, bucket, token, and that the body uses the format expected by your instance. An invalid timestamp or a reading with negative measurements should fail in the Code node before storage is attempted.
This example’s broker is configured for local testing. If you use it in a real deployment, replace anonymous access with authentication, topic permissions, and TLS; these measures are also included in the energy monitoring project’s security recommendations.